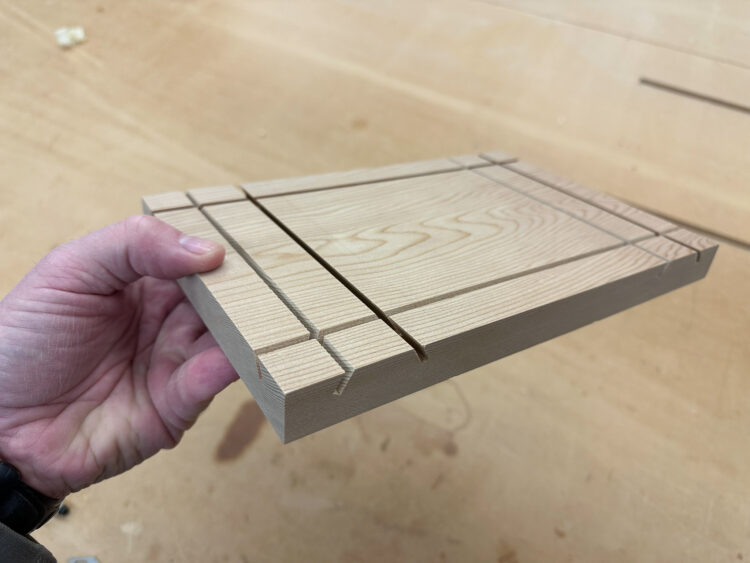
Close Menu
primehub.blog

    Subscribe to Updates

    Get the latest creative news from FooBar about art, design and business.

    What's Hot

    Use Your Excess Stock Market Gains to Actually Change Your Life

    May 1, 2026

    The 7 Best Convertible Cribs For Your Baby (2026)

    May 1, 2026

    What to Expect and What to Do if You Have a Ticket –

    May 1, 2026
    Facebook X (Twitter) Instagram
    primehub.blog
    Trending
    • Use Your Excess Stock Market Gains to Actually Change Your Life
    • The 7 Best Convertible Cribs For Your Baby (2026)
    • What to Expect and What to Do if You Have a Ticket –
    • Make a Yakisugi Display Stand
    • Which Chef Are You? | Cup of Jo
    • How to Take Better Photos of Moms (Listen Up, Dads)
    • The Best Snake Repellents of 2026, Vetted by Experts
    • Esthetician-Recommended Skincare: What Experts Actually Use
    • Home
    • Health
    • Finance
    • Lifestyle
    • Food
    • Travel
    • DIY
    • Eco Living
    • Tech
    primehub.blog
    Home » Make a Yakisugi Display Stand
    DIY

    Make a Yakisugi Display Stand

    PrimeHubBy PrimeHubMay 1, 2026No Comments3 Mins Read0 Views
    Share Facebook Twitter Pinterest LinkedIn Tumblr Email
    Make a Yakisugi Display Stand
    Share
    Facebook Twitter LinkedIn Pinterest Email

    1. Lay Out

    The first step is to do a little layout. I’ll start by marking the thickness of the top at ½”. Then I lay out the feet. They will have a base measurement of 1″ wide, and start 1″ in from all four edges. Next, from the bottom of the feet, I’ll mark 60° lines.

    2. Cut

    Now it’s over to the table saw. I start by setting the blade to 60°, and to a height just barely touching the top line, then clamping a stop to a sliding miter gauge to make all of the internal cuts, and I cut all four sides. Once those are done, I move the stop and make all four of the external foot cuts.

    Next I set the blade back to 90°, reset the height and make a bunch of kerfs between the feet, being careful not to cut into them. These kerfs are to make the removal of the material easier for the chisel. One could also just use a dado stack and take it all out that way, but I’m going to chisel.

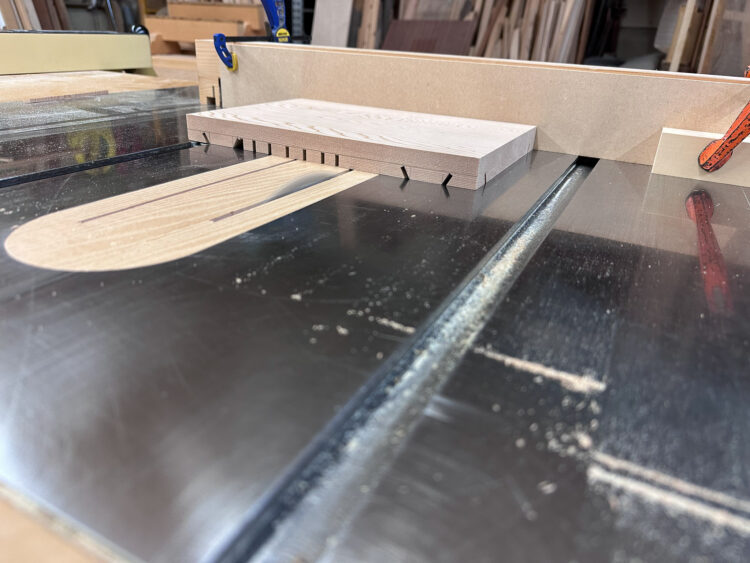
    After all the kerfing is complete, with the piece on edge against a fence set at ½”, I’ll reset the blade height to the line of the foot, and cut all four sides.
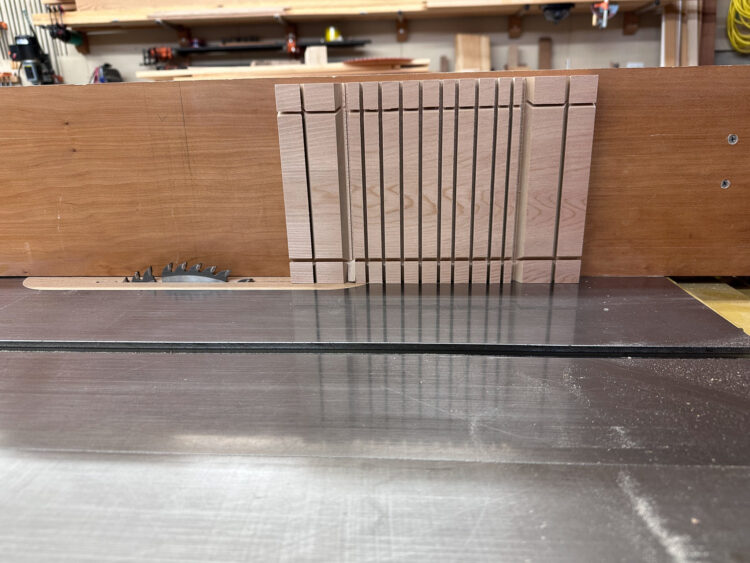
    3. Chisel

    Using a chisel and working from both sides, I remove all of the kerfed material between the feet. Avoid taking heavy passes because difficult grain can dive and curl in ways that cause a lot of tear-out.

    4. Sand

    When all the waste is removed I use a sander to clean it up. Even though the piece will be getting charred, any scratch or defect or pencil marks can telegraph through the burn, so it’s a good idea to sand the whole thing smooth.

    5. To the Torch!

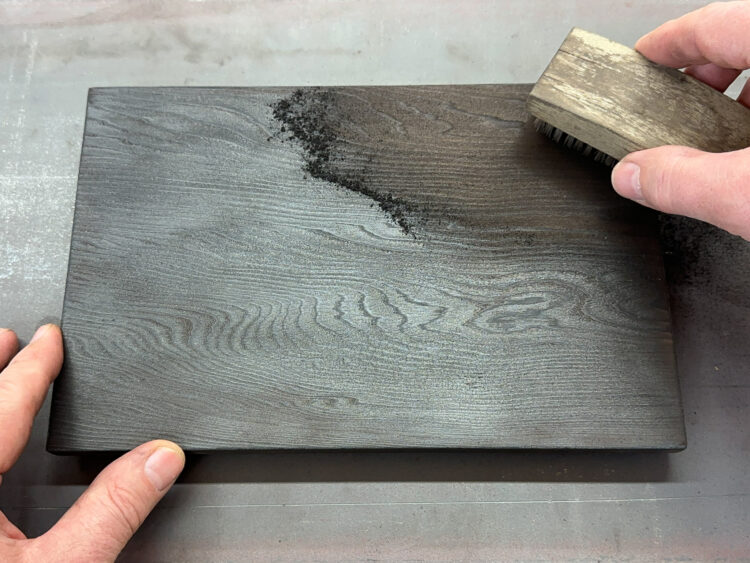
    To start out I give the bottom a light scorching. I don’t want to give it a full burn, just enough to help counteract the cupping that burning only one side can cause. Once it has sort of a tortoiseshell look, I’ll start doing the edges.

    Burn the edges using multiple passes, always blowing out any spot that keeps burning after the torch has passed. When all the sides are done, it’s time for the top. Again, getting it to an even, shiny black is best done in two or three passes.

    When everything has a cohesive burn, I use a fingernail brush to gently remove all the char. After brushing I use a paper towel to clean off all the loose dust.

    6. Finish

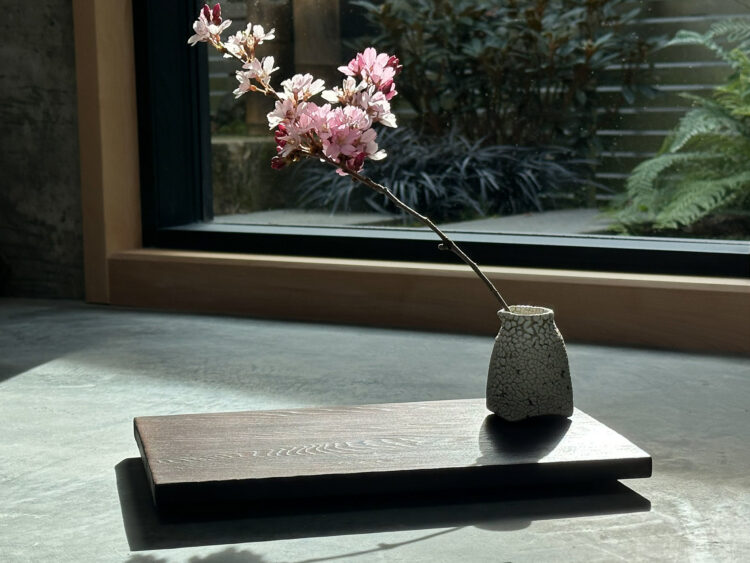
    Because this will be used for display, it’s a good idea to coalesce the surface. For this one I’m using two coats of satin Minwax Wipe-On Polyurethane. It goes on thin and maintains the feel of the piece without over-saturating or creating a visible film. Paste wax or thinned shellac work well too, each having different looks. Keep in mind that even with a finish, these are relatively delicate surfaces, so they should be handled with care.

    Conclusion

    The finished display stand.

    This project appeared in Make: Volume 97.

    Display Stand Yakisugi
    Share. Facebook Twitter Pinterest LinkedIn Tumblr Email
    PrimeHub
    • Website

    Related Posts

    DIY

    The Best Snake Repellents of 2026, Vetted by Experts

    April 30, 2026
    DIY

    A “Standard” Rental Became a Colorful, Tattoo-Inspired Dream

    April 28, 2026
    DIY

    Miami Maker Faire Rocked and Roared to Life

    April 27, 2026
    DIY

    How Often Should You Drain Your Water Heater?

    April 26, 2026
    DIY

    Open Hardware Summit 2026 is Going to Germany

    April 23, 2026
    DIY

    The 6 Best Deck Paints of 2026, Tested and Reviewed by Experts

    April 22, 2026
    Add A Comment
    Leave A Reply Cancel Reply

    Subscribe to News

    Get the latest sports news from NewsSite about world, sports and politics.

    Editor's Picks

    Use Your Excess Stock Market Gains to Actually Change Your Life

    May 1, 2026

    The 7 Best Convertible Cribs For Your Baby (2026)

    May 1, 2026

    What to Expect and What to Do if You Have a Ticket –

    May 1, 2026

    Make a Yakisugi Display Stand

    May 1, 2026
    Latest Posts

    20 Best Hotels in Tulum, From Luxury Resorts to Beach Bungalows

    August 24, 2025

    Things I Love at the Library

    August 24, 2025

    How to Test for Mold (Even If You Can’t See It)

    August 24, 2025
    Facebook Pinterest WhatsApp Instagram

    News

    • DIY
    • Eco Living
    • Finance
    • Food
    • Health

    catrgories

    • Lifestyle
    • Tech
    • Travel
    • DIY
    • Eco Living

    useful link

    • About Us
    • Contact us
    • Disclaimer
    • Privacy Policy
    • Terms and Conditions

    Subscribe to Updates

    Get the latest creative news from FooBar about art, design and business.

    © 2026 primehub.blog. Designed by Pro.
    • About Us
    • Contact us
    • Disclaimer
    • Privacy Policy

    Type above and press Enter to search. Press Esc to cancel.