


Photography by Andy Lee

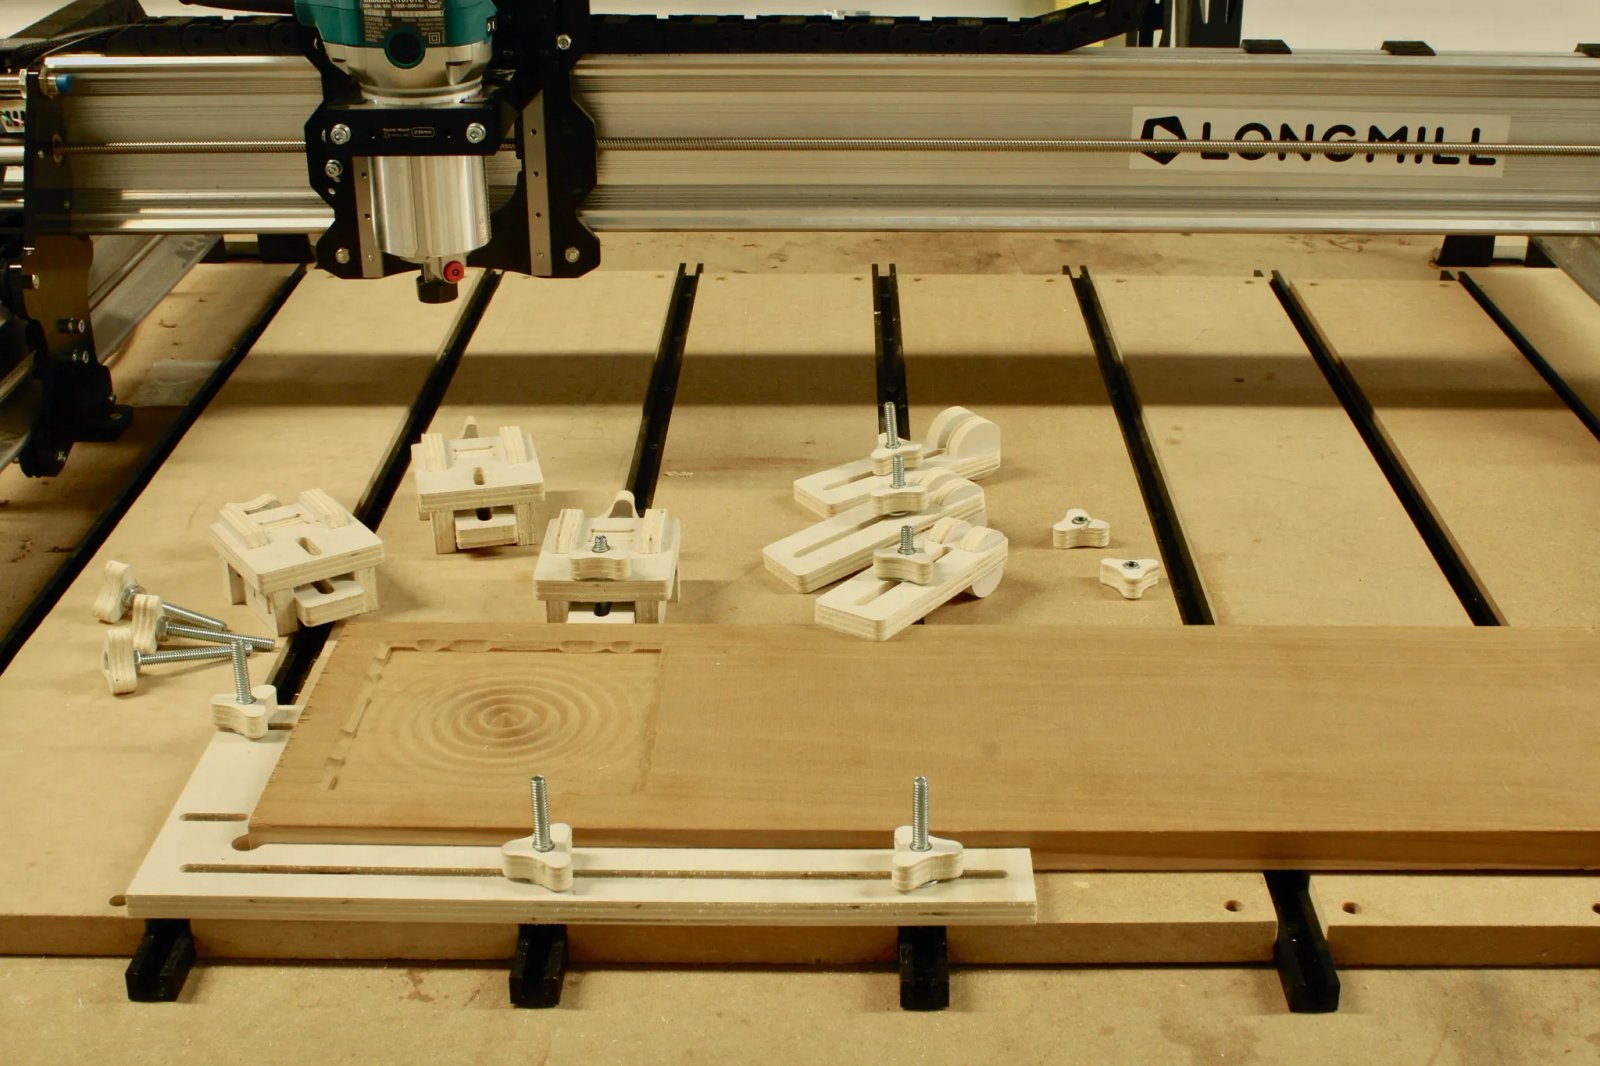
With every CNC router, strong and secure workholding is critical for a successful job. At Sienci Labs we’ve tried many designs, and created these universal clamps to be easy to use and make on any CNC router.
The goal for these designs is to allow folks to make their own clamps using cheap and easily available materials. For these projects, you’ll need plywood, ¼-20 fully threaded hex bolts of various lengths, ¼” washers, and ¼-20 threaded inserts. Depending on the T-track you have, you may need T-bolts that fit as well, but if you’re looking for a T-track for the first time, I’d recommend finding some that have a profile that fit ¼” hex bolt heads instead.
I’ve designed the clamps to use 11mm or ½” plywood because these are easiest to come by, but if you want to use other thicknesses, the Onshape design documents (hold down and toe clamp) are publicly available and can be adjusted to the materials you have on hand by changing the #thickness variable in Part Studio in Onshape.
General Cut Settings

All of these clamps can be milled easily on a CNC machine and assembled by sliding the parts together. While the downloadable designs are made for 11mm and ½” material, variations in the thickness of your material may affect how well parts slide together. For the most accurate fit of parts, I recommend measuring your material’s thickness with calipers, then using that thickness plus 0.1mm on the #thickness variable in Onshape. That being said, some gentle persuasion with a mallet will usually do the trick as well.
Everything is designed to be cut with a 1/8″ bit, as that’s what I’ve added reliefs for the radiuses on the inner corners for. Here are the DXF, sample G-code files, and other design notes.
These are the settings I’ve used to cut these parts out:
- Feed rate: 2000mm/min on the X and Y axes, 300mm/min on the Z axis
- Depth of cut: 3–4mm per pass, with the last pass being set to cut 0.5mm
- Spindle/router speed: Around 20,000RPM
- End mill: ⅛” downcut 2-flute end mill
If you want to get the cleanest-looking cut, a downcut bit will work well and a compression bit will work even better.
For the sake of accessibility, these designs have been made to work with ⅛” bits. But when I make slot-together projects, I actually generally use a 1/16″ corncob bit because:
- It leaves a fairly clean top and bottom edge
- It has a thicker overall body, which makes it less prone to breaking than a fluted 1/16″ bit
- It leaves most of the dust in the cutting path, so most of the time I can get away without needing tabs or other methods to keep the piece from flying out
- Since the radius is pretty small, a relief on the inner corner radius isn’t necessary for parts to fit together, and
- The cuts are thinner, so it also makes less dust and waste overall.
Since ⅛” straight bits are almost ubiquitous, I’ve just made the designs work with those, but if you can get some 1/16″ corncob bits to experiment with, I highly recommend it.
Hold-Down Clamps
Hold-down clamps are versatile and simple to use. This design is unique as it uses a rounded support at the back to allow for the right angle to apply downward pressure against your material. The optimal angle for securing your material is at a level or slightly angled down position. Based on the thickness of your material, simply flip the clamp upside down to use the side that offers the most optimal angle.
Since these clamps are made of wood, even if you have a bit of an “oops” and run into them while carving, you’ll minimize the damage to the machine, and since you can make them on your CNC, you’ll basically have an unlimited supply!
Tips:
- Threaded inserts are super handy in adding threaded holes to wood. Simply fit a hex head driver or Allen wrench into the top end of the insert and screw it into the pilot hole.
- The knobs and the semicircles are prone to flying out after cutting, so I recommend milling them a little slower on the final pass than you would on the body of the clamp.
- You’ll need different length bolts to accommodate different thicknesses of your project workpiece, but I’ve found that 1½” and 2″ bolts are suitable for most applications.
- If you make the toe clamps in the next part of the article, make sure to make extra knobs as you’ll need them there too!
Toe Clamps
If you don’t want to have clamps in the way of the top surface of your material, toe clamps are the way to go. By pushing in from the side, they stay away from the top of the material, and by angling the force downward, they’re able to keep the material from lifting up as well.
This clamp must have a hard stop for the other side of the material to butt up against. I’ve also included some designs for corner stops that can be bolted to a T-track table, but any solid stop for the material will work fine.
Tips:

- If your clamp can’t get close enough to your material, try using scrap blocks to fill the gap. This can also help if your clamps are getting in the way of your spindle or router.
- Watch out that your clamp doesn’t slide away on the table when you turn the toe knob. Because of the mechanical leverage you get in the screw, the amount of force you’re putting on the material may be enough to slide away the clamp as well.
Final Thoughts
I hope you find these designs useful as a starting point in building up your CNC workholding arsenal! Since these designs are freely open for you to use and modify, please feel free to make changes to the original design to make improvements and fit your needs.
Designing in Onshape

Onshape offers a free, hobby and education use license for full functionality of their program on the cloud, with the exception that all projects made on the free plan are public and searchable. This means that derivatives of these designs will also be available to the public.
To modify a design, you’ll need to create an Onshape account and duplicate/copy a new version to make changes.
Most CNC users will likely want to export all of the parts as DXFs. This is a very easy process. Simply right-click the side of the model whose planar faces you wish to export, and select Export as DXF/DWG. Then import the vectors into your CAM software.
Visit cad.onshape.com/help/Content/exporting-files.htm for more detailed information.
This project is from Make: Volume 85.
