


Before You Begin
Just as important as using the proper tools, purchasing the correct wood for the job is essential for long-lasting functionality. So, before you begin learning how to build closet shelving, it’s a good idea to consider how the closet will be used. If you expect the homemade shelves to hold medium- to heavy-weight items, like full tool boxes and tools, then it’s best to invest in furniture-grade plywood or even cherry wood.
However, if you are building closet shelves for light- to medium-weight objects, like kids’ toys, board games, or similar items, then you can use particle board, pine, melamine, laminate wood, or MDF (medium-density fiberboard). Consider the exact purpose for your DIY custom closet, then purchase the necessary material before starting.
Step 1: Measure and mark the cleat installation locations.
To ensure your built-in closet shelves are spaced evenly and to the specifications you desire, you will need to measure the height for each of the shelves and mark the cleat locations. Additionally, if you are installing both DIY closet shelves and rods, factor in the closet rod height when measuring.
Generally, the top shelf in a closet is installed about 84 inches from the floor, middle shelves are frequently placed around 42 inches from the floor, and bottom shelves start at about 6 to 7 inches from the floor to provide enough clearance for footwear. For the shelves in-between, it’s recommended to leave about 12 to 15 inches of vertical space between shelves.
However, you should adjust the spacing and shelf height based on what you are storing to ensure that you have enough room. Once you know how you want to organize your closet shelves, use a tape measure and pencil to mark the cleat locations directly below where you want the shelves to sit. Next, use a stud finder to locate the studs behind the walls and mark the stud locations.
Step 2: Cut the cleats to the appropriate size.
Measure the back and side walls of the closet and use these measurements to determine the length of your 1×2 cleats. Use a miter saw to cut cleats that match the width of the closet and cleats that match the depth of the closet.
Keep in mind that for a uniform look, these cleats should sit flush with each other, so you will need to account for the position and size of the cleats when taking measurements and making cuts.
- Butt joint: If you want to butt joint the cleats in the corners on the back wall, then your side wall cleats should be about one inch shorter than the depth of the closet to account for the thickness of the back wall cleat.
- Miter joint: Alternatively, some of the top closet design companies will miter the ends of the cleat joints at a 45-degree angle so that they fit together for a cleaner look.
It’s also a good idea to take the opportunity to prime and apply one coat of paint to the cleats before installation, rather than completing this step after they are installed. However, you will still need to fill fastener holes and paint one more coat.

Step 3: Secure the cleats to the back and side walls.
After you have measured and cut the cleats, it’s time to install them. Position the cleats according to the marks you made previously, then use a level to check and make sure that they are positioned properly. When you are ready, use 2-inch wood screws and a drill to fasten the cleats on the back and side walls of your DIY closet shelving unit. Make sure that you drive the screws through the cleats and into the studs for secure support.
Step 4: Measure and cut the shelf boards.
Typical closet organization layouts have closet shelves that range from about 12 inches to 16 inches deep, depending on the purpose and the available space. Shelves with a 16-inch depth are generally better for maximizing storage in larger closets, while shelves with a 12-inch depth are more standard in size.
Determine how deep you want your shelves, then either purchase shelf boards with the correct depth or cut them to the correct depth. Measure the width of the closet and cut the length of the shelf boards to match so that they can sit neatly on top of the installed cleats.
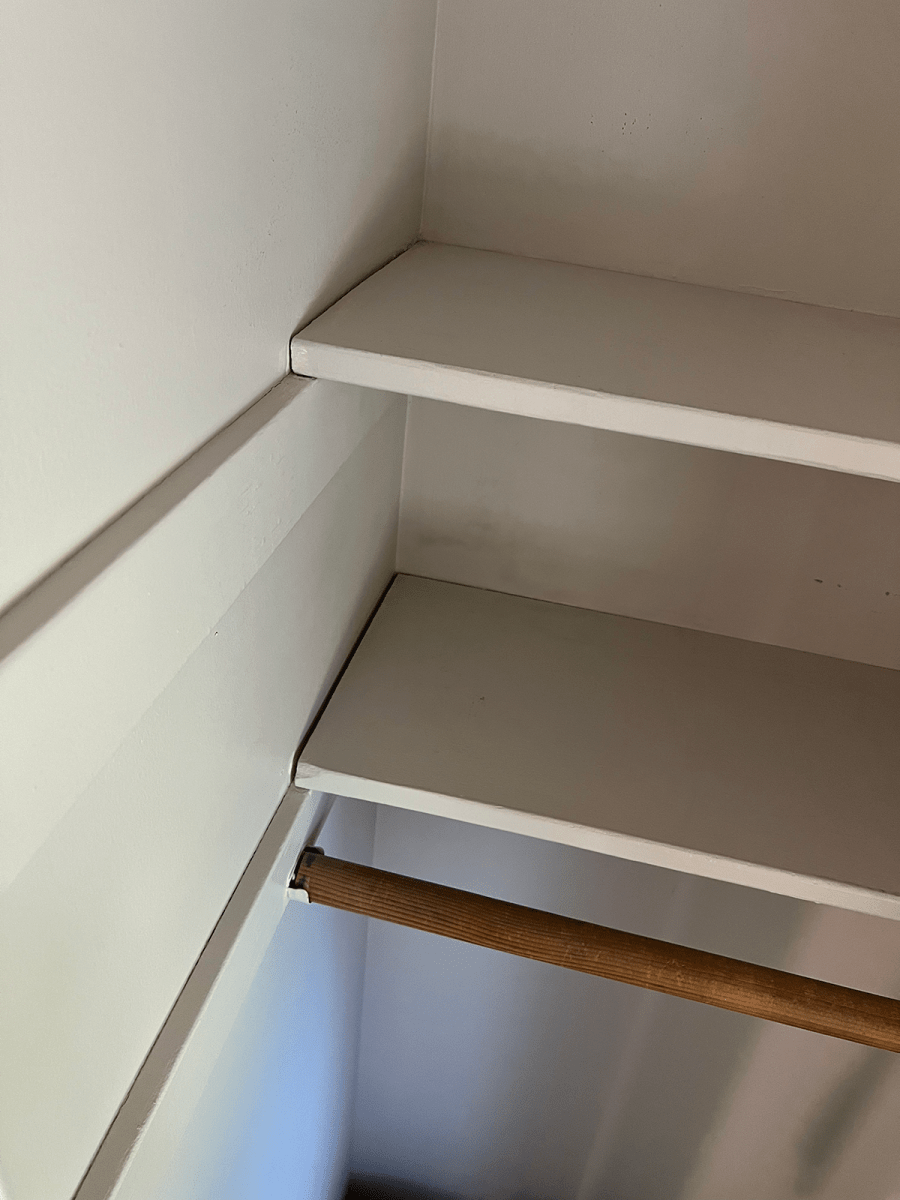
Step 5: Mount the shelf boards.
The final step is to install the shelf boards. In most cases you can simply slide the shelves in at an angle, then lower them down to rest freely on the supports. But, if you are concerned about the shelves shifting, use screws to fasten the shelves to the cleats. Just make sure that if you are securing the shelves to the cleats that you start with the lowest shelf first so that the shelf above does not get in the way of the drill.
Final Thoughts
Installing DIY closet shelves is relatively easy and can be completed in just a couple hours or less, depending on your familiarity with taking measurements, cutting materials, and installing these materials. Just make sure to measure at least twice before making any cuts to avoid mistakes and take the time to properly plan the layout of the closet so you know exactly what you are trying to accomplish before you begin.
It should also be noted that if you have a very wide closet space, then you may need to install additional closet shelf brackets to help prevent any bowing. Generally, additional brackets should be installed when an unsupported span exceeds 24 inches. However, if you follow the above steps, then you should only need an additional bracket if the shelves measure longer than 36 inches.
I Was Dead Set On Stone Floors—Until I Saw These Options