


Now let’s look at the telemetry. Since the serial interface and the servo operate bidirectionally, various measured values can be continuously read out.
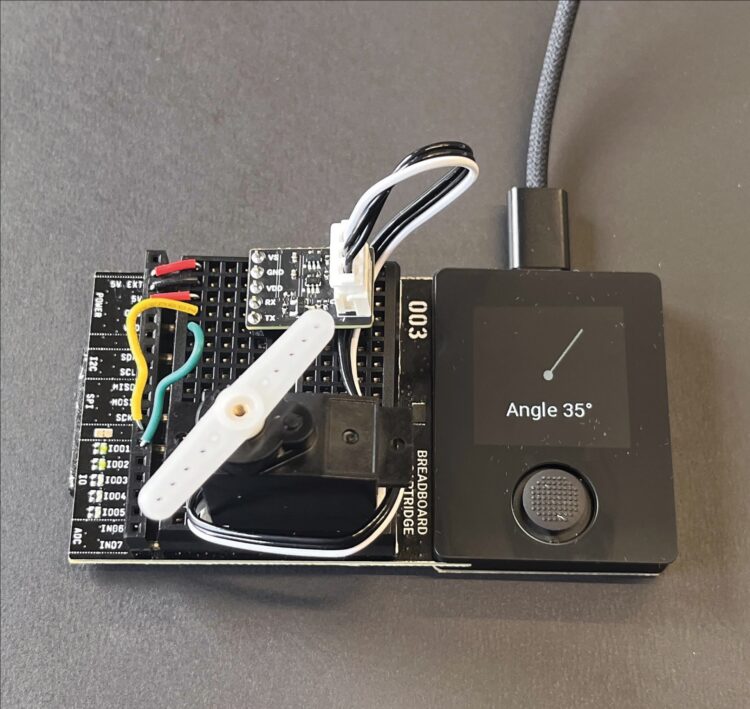
In this exercise, we first move the servo to the center position and then deactivate the control. This allows the servo horn to be moved manually. The servo now acts as a sensor: The integrated potentiometer provides a numerical value between 0 and 1,000 over a rotation range of approximately 300 degrees.
The servo has no fixed end stops — the servo horn can rotate a full 360 degrees. However, this potentiometer has a “blind spot” of approximately 50 to 60 degrees, where the potentiometer does not provide stable values, or jumps abruptly from the lower to the upper end of the measuring range. Within this gap the pot cannot be reliably used for angle measurement.
The “Read Angle” script begins, as before, by initializing and centering the servo. The drive is then deactivated, and the current position is read every 100ms.
Code example: Read Angle
Line   Code
1    import serial_servo
2
3    servoBus: SerialServoBus
4    servoBus.init(C_PIN_02, C_PIN_01, 1000000)
5    servoBus.setPosition(1,500,1000)
6    delay(1000)
7    servoBus.stopServo(1)
8
9    setInterval(100)
10
11   def onTimer():
12       a = servoBus.getPosition(1)
13       range300rad = 2.0*PI*0.821
14       range300deg = deg(range300rad)
15       ang = map(a,0,1000,0,range300 rad)
16       push()
17       translate(120,120)
18       clear()
19       fill(150,150,150)
20       drawCircle(0,0,8)
21       rotate(ang-(range300rad*0.5))
22       drawRectangle(-2,-100,4,100)
23       pop()
24       textFont(FONT_ROBOTO_32)
25       setPrecision(0)
26       drawTextCentered(120, 180, (deg(map(a,0,1000,0,range300rad)) - range300deg/2) + "°")
27       update()
Explanation of the code
- Lines 1–6: Initialize the servo library and position the servo in the center position.
- Line 7: Deactivate the motor — the servo horn can now be moved manually (with slight resistance).
- Lines 9–11: After each call to onTimer(), the current position of the server will be read. Line 9 sets an interval of 100ms (1/10 second) between calls.
- Lines 11–15: After each call, the current position is read on line 12. This is a value between 0 and 1,000, which we convert into an angle on lines 13–15.
- Lines 16–27: The drawing routine sets the origin to the center of the screen (translate) and rotates the drawing area around this point according to the calculated angle. Then a narrow pointer is drawn as a rectangle.
NOTE: The graphics commands used here are explained in the introductory course that’s built into the NanoPy IDE, under Examples / Getting Started / Basics.